How to Clean Makeup Brushes: A Complete Step-by-Step Guide
Have you ever finished your makeup, looked in the mirror, and wondered why your foundation looked streaky or your eyeshadow refused to blend? Many people assume they need better makeup products, but the real problem is often much simpler—dirty makeup brushes.
I’ve noticed that one of the most common mistakes people make is waiting until their brushes look visibly dirty before cleaning them. By then, the bristles may already be filled with makeup residue, skin oils, and dust. Besides affecting how your makeup looks, this buildup can also make brushes feel stiff and shorten their lifespan.
The good news is that cleaning makeup brushes doesn’t have to be difficult or expensive. In most cases, a gentle cleanser, lukewarm water, and a few minutes of your time are all you need to keep your brushes in excellent condition.
In this guide, you’ll learn how to clean makeup brushes step by step, how often they should be washed, which cleaning products are safe to use, common mistakes to avoid, and simple tips to help your brushes last for years. Whether you’re just starting your makeup journey or already have a full collection of brushes, these techniques can help you keep your beauty tools clean, hygienic, and performing at their best.
| Topic | Quick Answer |
| Time Required | 5–10 minutes |
| Drying Time | 6–12 hours |
| Difficulty | Easy |
| Best Cleaner | Baby shampoo or makeup brush cleanser |
| Deep Cleaning | Once a week for cream products |
| Spot Cleaning | Between makeup applications |
| Best Drying Method | Lay brushes flat |
Quick Answer
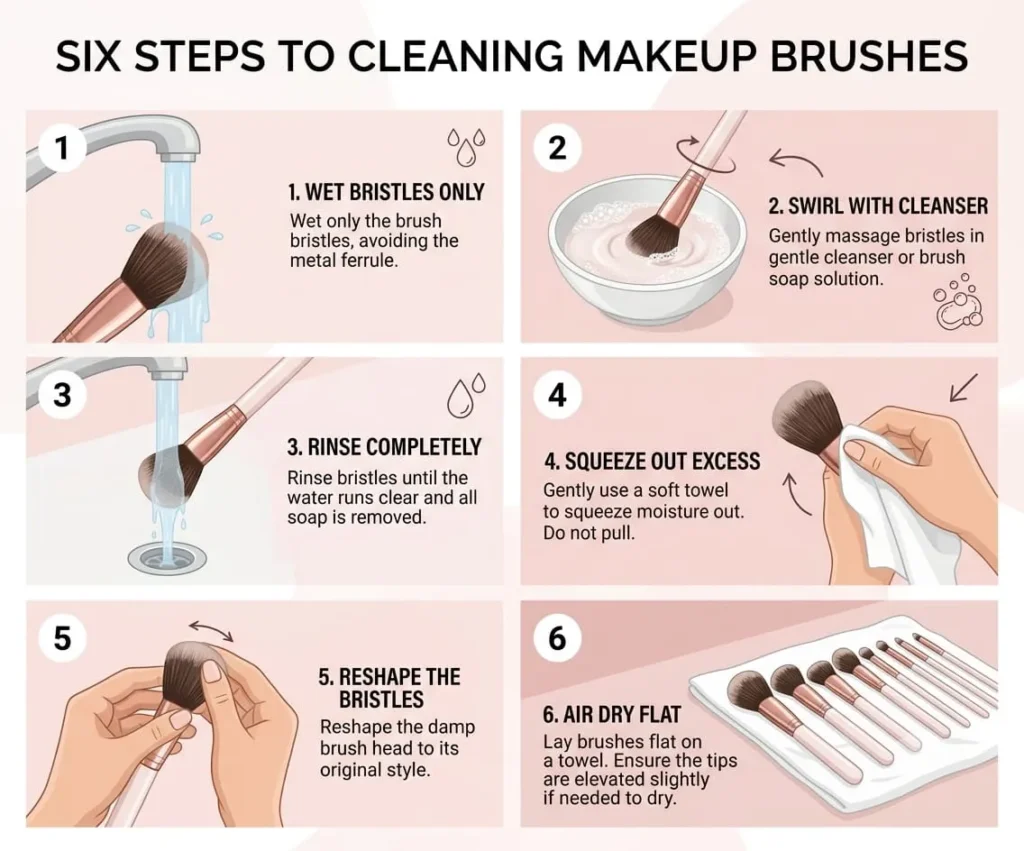
To clean makeup brushes, wet only the bristles with lukewarm water, wash them with a gentle cleanser, rinse until the water runs clear, gently squeeze out excess water, reshape the bristles, and lay them flat to air dry completely.
What You Will Need
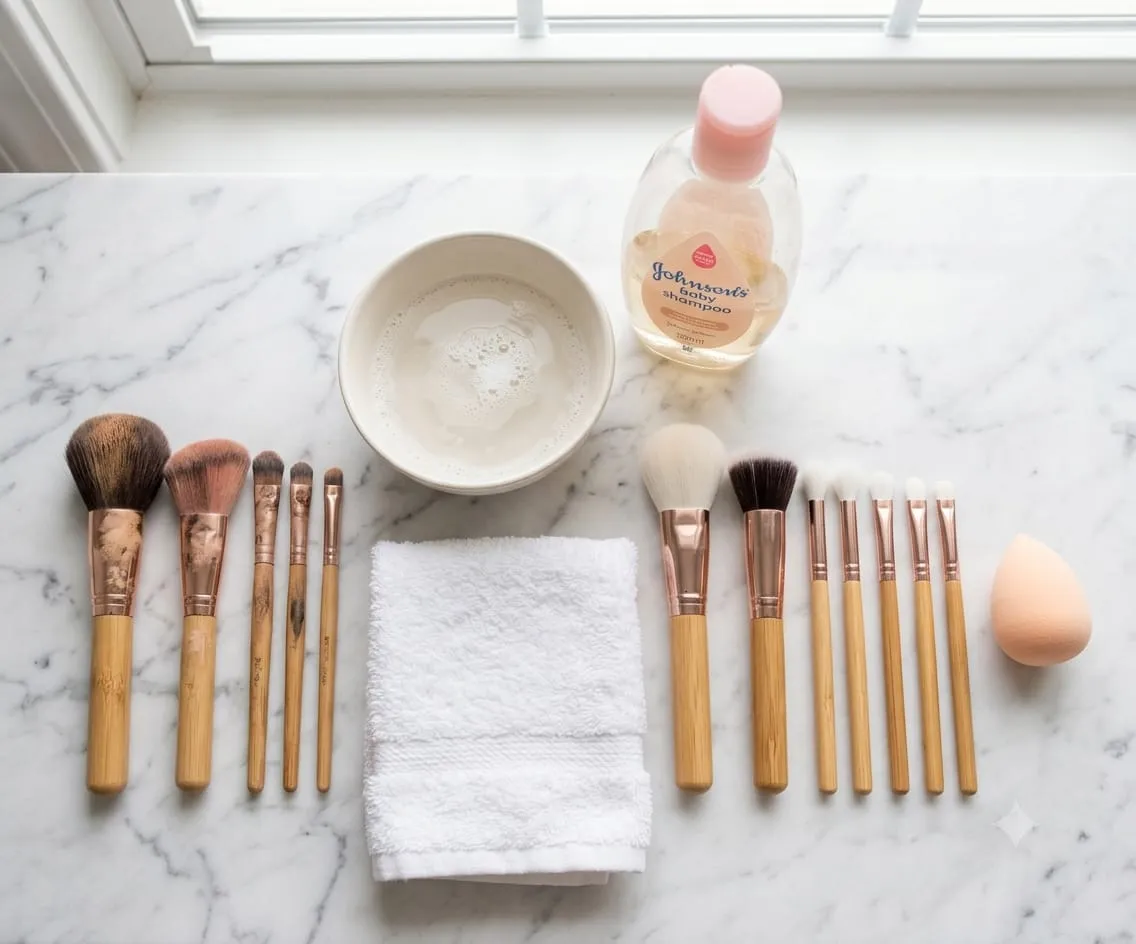
Before you start, it helps to gather a few basic supplies. Most of these items are things you likely already have at home, so there’s no need for a special shopping trip.
- Lukewarm water
- A gentle shampoo or makeup brush cleanser
- A small bowl or your clean palm
- A microfiber towel or clean hand towel
- A silicone brush cleaning mat (optional)
- Paper towels for drying (optional)
If your brushes are coated in heavy foundation or waterproof makeup, a dedicated makeup brush cleanser will usually break down that stubborn residue more effectively than a regular cleanser would. For everyday cleaning, though, a gentle baby shampoo or mild cleanser does the job just fine.
Quick Tip: Avoid very hot water when washing your brushes. Heat can weaken the glue inside the brush handle, which shortens the overall lifespan of your brushes.
Why Should You Clean Makeup Brushes?
Cleaning your makeup brushes isn’t just about appearances. It plays a real role in protecting your skin, improving how your makeup applies, and helping your brushes stay in good condition for longer.
Expert Tip: Dermatologists recommend cleaning makeup brushes regularly because they collect oil, makeup residue, dead skin cells, and microorganisms over time. Brushes used with cream products and eye makeup deserve extra attention, since they tend to accumulate more residue and are used on more sensitive areas of the face.
Dirty Brushes Can Collect Bacteria
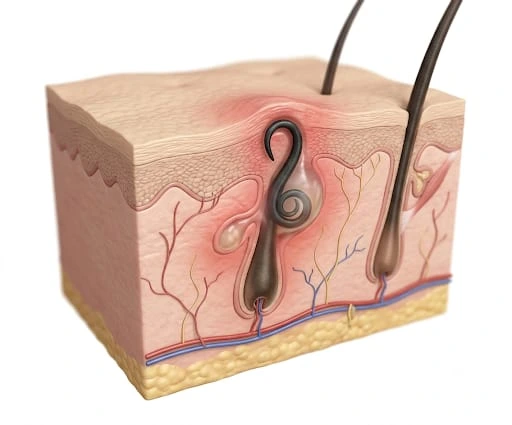
Every time you use a makeup brush, it picks up more than just makeup. It also absorbs facial oil, sweat, dead skin cells, and tiny particles floating in the air, and as these build up, bacteria can start to grow within the bristles.
Reusing a dirty brush again and again may increase the chance of skin irritation or acne, particularly if you work with liquid or cream products. Brushes used around the eyes deserve the same level of care, since that area of the face is naturally more sensitive.
Clean Brushes Give Better Makeup Results
When old makeup gets left behind inside the bristles, it makes the brush stiff and far less effective at doing its job. This often leads to streaky foundation, uneven blush, patchy eyeshadow, or makeup that simply won’t blend the way you want. Shade choice compounds the problem; a blush that fights your undertone looks worse still through a dirty brush. The dark winter makeup palette covers which cool-toned shades to reach for.
Fresh, clean brushes hold and apply product much more evenly. They also make blending noticeably easier and help create a smoother, more polished finish. Clean brushes also make it easier to apply styling and finishing products evenly, especially when creating defined looks for curly hair.
Regular Cleaning Helps Brushes Last Longer
Good-quality makeup brushes are a genuine investment, and cleaning them the right way helps protect that investment. Washing them properly removes product buildup without damaging the bristles, which helps the brushes keep their shape, stay soft, and continue performing well for much longer.
Dirty Brushes Can Affect Your Makeup Products
A dirty brush doesn’t just carry bacteria to your face — it can also transfer oils, old makeup, and bacteria straight back into your cosmetics. Over time, this can reduce the quality of your products and increase the risk of contamination.
Keeping both your brushes and your makeup clean helps maintain better hygiene throughout your entire beauty routine.
It Only Takes a Few Minutes
Many people avoid cleaning their brushes simply because they assume it will take too much time. In reality, washing your brushes once a week only takes a few minutes, and doing so regularly can save you from having to replace expensive brushes far too soon.
Once brush cleaning becomes part of your routine, it starts to feel quick, easy, and almost automatic.
Key Takeaways
- Clean makeup brushes help protect your skin.
- Dirty brushes can collect oil, dead skin, and bacteria.
- Clean brushes give smoother and more even makeup application.
- Regular washing helps brushes last longer.
- A simple weekly cleaning routine can improve both skin health and makeup performance.
Step-by-Step Process: How to Clean Makeup Brushes
Cleaning your makeup brushes is simple once you know the right steps to follow. The process removes makeup, oil, and dirt without damaging the bristles, and it works whether you use your brushes every single day or only pull them out for special occasions.
Step 1: Prepare a Cleaning Solution
Start by choosing a gentle cleanser, since a mild baby shampoo or a dedicated makeup brush cleanser works well for most brush types. Pour a small amount into a bowl and mix it with lukewarm water.
If your brushes have thick foundation or waterproof makeup on them, reach for a cleanser made specifically for makeup brushes. It’s designed to break down heavy product without harming the bristles in the process.
Try to avoid using very hot water, since high heat can loosen the glue that holds the bristles in place.
Tip: Only wet the bristles themselves. Try to keep water away from the ferrule, which is the metal part connecting the bristles to the handle.
Step 2: Swirl the Brush in the Cleanser
Dip only the bristles into your cleaning solution, then gently swirl the brush in the bowl or across the palm of your hand.
If you have a silicone cleaning mat, move the brush in small circles across its textured surface, which helps loosen stubborn makeup and oil trapped deep inside the bristles. Keep swirling until you see the makeup start to wash away.
Try not to press too hard while doing this — gentle movements help protect the brush’s shape over time.
Step 3: Rinse with Lukewarm Water
Hold the brush with the bristles pointing downward under running lukewarm water, and keep rinsing until the water runs clear. This is a good sign that most of the makeup and cleanser has been removed.
Use your fingers to gently smooth the bristles while rinsing, which helps wash away any product still trapped inside the brush.
Never hold the brush with the bristles facing upward while rinsing, since water can seep into the handle and weaken the glue over time.
Step 4: Repeat If the Brush Is Still Dirty
Some brushes need a second wash, especially foundation, concealer, or contour brushes, since these tend to collect thicker cream products.
If you still see traces of makeup on the bristles, apply a little more cleanser and repeat the process. Continue until the brush feels clean and the rinse water stays clear.
There’s no need to scrub hard — a second gentle wash is usually more than enough.
Step 5: Remove Excess Water
Once the brush is clean, gently squeeze the bristles with your fingers or a clean towel to remove any extra water.
Avoid twisting or pulling the bristles, since this can damage their shape and cause unnecessary shedding.
Use a towel to absorb the remaining moisture before you move on to drying.
Step 6: Let the Brushes Dry Properly
Lay your brushes flat on a clean towel, letting the bristles hang slightly over the edge of a table if possible. This allows air to circulate around the bristles and helps them dry more evenly.
Let the brushes air dry completely before using them again. Avoid standing wet brushes upright in a holder, since water can run down into the handle and loosen the adhesive inside.
It’s also best to avoid using a hair dryer or placing brushes near direct heat, as high temperatures can damage both natural and synthetic bristles. Most brushes dry within several hours, though larger foundation or powder brushes may need to dry overnight.
Common Mistakes to Avoid
Even small mistakes can shorten the life of your makeup brushes, so it’s worth keeping these tips in mind every time you clean them.
Do Not Use Hot Water
Hot water can weaken the glue inside the brush handle, which may eventually cause bristles to fall out.
Do Not Soak the Entire Brush
Only the bristles should get wet during cleaning. Soaking the entire brush, including the handle and ferrule, can cause lasting damage.
Do Not Twist the Bristles
Always squeeze out excess water gently rather than twisting the brush, since twisting can bend or break the individual fibers.
Do Not Dry Brushes Upright
Wet brushes should always dry lying flat. This simple habit helps protect the glue inside the handle and keeps the bristles in good shape.
Do Not Store Damp Brushes
Wait until your brushes are completely dry before putting them away, since storing damp brushes can encourage mold growth or unpleasant odors.
| ✅ Do | ❌ Don’t |
| Use lukewarm water | Use hot water |
| Clean brushes regularly | Wait until brushes look dirty |
| Air dry brushes flat | Dry brushes upright |
| Use a gentle cleanser | Use harsh household cleaners |
| Clean only the bristles | Soak the entire brush |
How Often Should You Clean Makeup Brushes?
Most people know they should clean their makeup brushes, but many aren’t sure exactly how often. The honest answer depends on the type of brush you’re using and the products you apply with it.
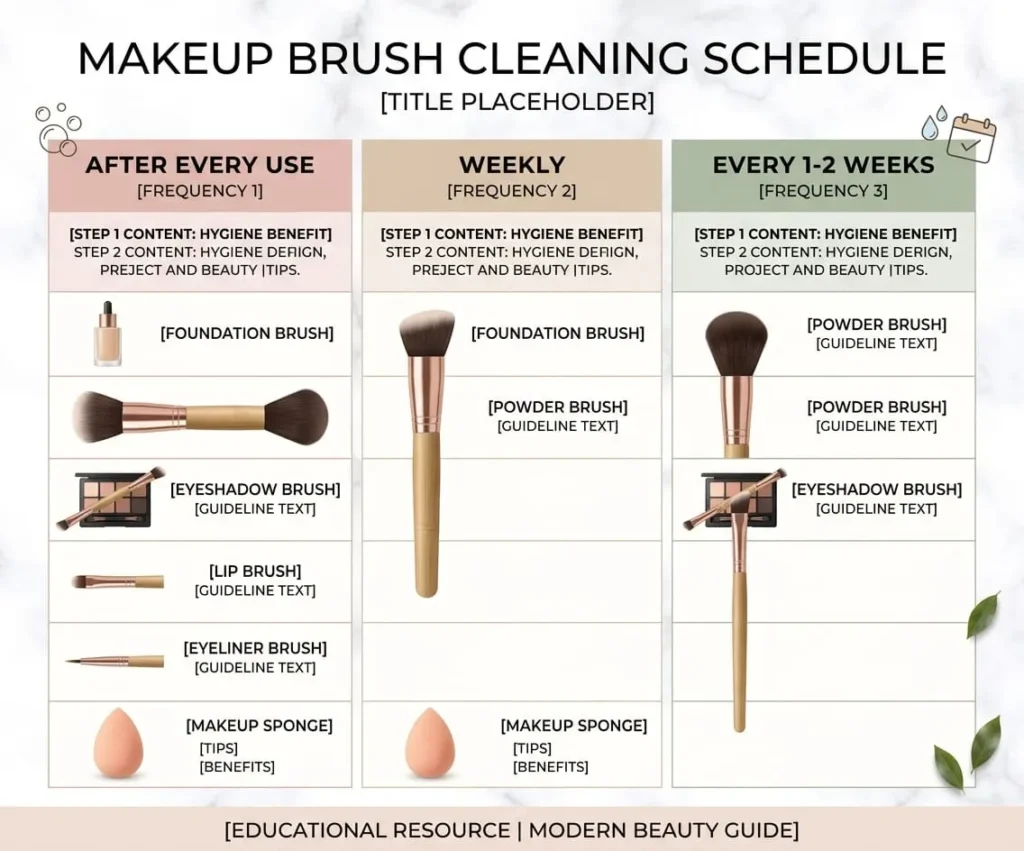
Brushes used with liquid or cream makeup tend to collect more oil and product buildup than brushes used mainly with powders, which means they generally need more frequent cleaning. The table below can help you build a simple routine that fits your own collection.
| Brush Type | Recommended Cleaning Frequency |
| Foundation brush | Once a week |
| Concealer brush | Once a week |
| Cream blush or contour brush | Once a week |
| Powder brush | Every 1 to 2 weeks |
| Blush brush | Every 1 to 2 weeks |
| Bronzer brush | Every 1 to 2 weeks |
| Highlighter brush | Every 1 to 2 weeks |
| Eyeshadow brushes | Once a week |
| Eyeliner brush | After every few uses |
| Lip brush | After each use |
If you’re a professional makeup artist or share your brushes with clients, it’s best to clean and sanitize them after every single use. This helps reduce the spread of bacteria and keeps your tools genuinely hygienic.
Build a Simple Weekly Brush Cleaning Routine
If you wear makeup most days, setting up a simple routine makes brush care feel far less like a chore. Here’s an example you can adapt to your own habits:
- After each use: Wipe away excess makeup from your brushes.
- Once a week: Deep clean foundation, concealer, and eye brushes.
- Every one to two weeks: Wash powder, blush, and bronzer brushes.
- Once a month: Check your brushes for wear, reshape the bristles, and clean your makeup storage area.
Signs Your Makeup Brushes Need Cleaning
Sometimes your brushes will let you know it’s time for a wash. Watch for these common signs:
- The bristles feel stiff.
- Makeup does not blend well.
- The brush leaves streaks.
- The brush has a bad smell.
- The bristles stick together.
- Old makeup is visible inside the brush.
- The brush changes color from product buildup.
If you notice any of these signs, it’s a good indicator that a deep clean is overdue.
Best Products to Clean Makeup Brushes
There isn’t one single cleaner that works perfectly for everyone. The best option really depends on the type of brush you own and the makeup products you typically use with it.
Baby Shampoo
Baby shampoo is one of the most popular choices for brush cleaning because it’s gentle, affordable, and easy to find. It suits regular, everyday cleaning well.
Best for:
- Weekly cleaning
- Natural bristle brushes
- Synthetic brushes
Makeup Brush Cleanser
Brush cleansers are formulated specifically to remove makeup quickly, and many also help sanitize the bristles as part of the process.
Best for:
- Heavy makeup buildup
- Professional makeup artists
- Deep cleaning
Solid Brush Soap
Solid brush soaps are easy to use and convenient to travel with, and they also pair well with silicone cleaning mats.
Best for:
- Foundation brushes
- Powder brushes
- Travel kits
Mild Face Cleanser
A gentle face cleanser can work in a pinch if you don’t have a dedicated brush cleaner at home. Just be sure to choose one without harsh exfoliating ingredients.
Can You Use Dish Soap?
Dish soap removes oil very effectively, but it shouldn’t be your go-to choice for regular brush cleaning, since it may dry out some natural bristles if used too often. If you do decide to use it occasionally, stick to a small amount and rinse the brush thoroughly afterward.
Natural vs. Synthetic Makeup Brushes
Not all makeup brushes are made from the same materials, and knowing the difference can help you choose the right cleaning approach for each one.
Natural Bristle Brushes
Natural brushes are usually made from animal hair, and they tend to be soft and work especially well with powder products. Because of this, they need gentler care, as strong cleansers may dry out the fibers over time.
Tips for natural brushes:
- Use a gentle shampoo or brush cleanser.
- Wash with lukewarm water.
- Avoid harsh detergents.
- Let them air dry naturally.
Synthetic Brushes
Synthetic brushes are made from man-made fibers and are commonly used with liquid and cream makeup. They’re generally easier to clean and tend to dry faster than natural brushes.
Tips for synthetic brushes:
- Use a gentle cleanser or brush soap.
- Remove foundation and concealer after each use.
- Deep clean every week if used daily.
How to Clean Makeup Sponges and Beauty Blenders
Makeup sponges soak up a large amount of liquid product as you use them, and because they stay damp longer than brushes, they need to be cleaned more frequently.
Step 1: Wet the Sponge
Run the sponge under lukewarm water until it is fully soaked through.
Step 2: Add Cleanser
Apply a small amount of gentle soap or a makeup sponge cleanser directly onto the wet sponge.
Step 3: Massage the Sponge
Squeeze and release the sponge several times in a row, since this action helps push foundation and other trapped makeup out from inside it.
Step 4: Rinse Until the Water Is Clear
Continue rinsing and squeezing the sponge until no more makeup washes out, repeating the process if needed.
Step 5: Air Dry
Place the sponge in a clean, well-ventilated area and allow it to dry completely before storing or reusing it.
Spot Cleaning vs. Deep Cleaning
There are two main ways to clean makeup brushes, and knowing when to use each one helps keep your brushes in excellent condition year-round.
Spot Cleaning
Spot cleaning is a quick way to remove makeup from the surface of the bristles without a full wash. It’s especially useful:
- Between makeup applications
- When changing makeup colors
- During travel
- For daily maintenance
Keep in mind that spot cleaning does not replace a full, deep wash.
Deep Cleaning
Deep cleaning goes further, removing oil, bacteria, dead skin cells, and makeup trapped deep inside the brush. It should be done on a regular schedule based on how often you actually use your brushes, and it’s what keeps them soft, clean, and ready for your next application.
How to Dry Makeup Brushes the Right Way
Drying your brushes correctly is just as important as washing them properly, since even a clean brush can become damaged if it’s dried the wrong way. Keep these simple tips in mind for the best results.
Lay Brushes Flat
Place your brushes on a clean towel after washing them, letting the bristles hang slightly over the edge of a table if possible. This allows air to circulate freely and helps the brush dry faster and more evenly.
Let Them Air Dry
Always allow your brushes to dry naturally rather than rushing the process. Most eye brushes dry within a few hours, while larger powder and foundation brushes may take overnight to dry completely.
Avoid Direct Heat
Resist the urge to speed things up with a hair dryer, heater, or direct sunlight, since too much heat can damage the bristles and weaken the glue inside the brush.
Do Not Dry Brushes Upright
Standing wet brushes in a cup allows water to flow down into the ferrule. Over time, this can loosen the glue and cause the bristles to shed.
How to Store Makeup Brushes
Clean brushes stay in good condition much longer when they’re stored the right way. Keep these simple storage tips in mind:
- Store brushes only after they are completely dry.
- Keep them in a clean brush holder or makeup organizer.
- Store them away from moisture and humidity.
- Keep brushes covered while traveling.
- Avoid crushing the bristles inside crowded makeup bags.
Proper storage helps your brushes stay clean and ready to use between washes.
How to Make Your Makeup Brushes Last Longer
High-quality makeup brushes can last for years when they’re given proper care. To extend their lifespan:
- Clean them on a regular schedule.
- Avoid soaking the ferrule in water.
- Let brushes air dry naturally.
- Store them where the bristles won’t be bent or crushed.
- Replace brushes only when they no longer perform well.
When Should You Replace Makeup Brushes?
Even with regular cleaning, makeup brushes don’t last forever. It’s time to replace a brush if you notice any of the following signs:
- Bristles fall out during use.
- The brush has lost its shape.
- The bristles feel rough or scratchy.
- The handle becomes loose.
- The brush no longer blends makeup well.
- The brush has a smell that does not go away after washing.
With proper cleaning and care, high-quality brushes can realistically last for many years before any of these signs appear.
Professional Tips for Cleaner Makeup Brushes
Professional makeup artists rely on a few simple habits to keep their brushes in excellent condition, and you can easily build the same habits into your own routine at home.
- Wipe away excess makeup after every use.
- Wash brushes on a regular schedule.
- Keep separate brushes for cream and powder products.
- Use a quick-drying brush cleanser between clients or makeup looks.
- Replace worn brushes before they affect your makeup application.
- Store clean brushes in a dust-free place.
These small habits add up and make a noticeable difference over time.
Frequently Asked Questions
Can I Use Baby Shampoo to Clean Makeup Brushes?
Yes. Baby shampoo is a gentle option that works well for both natural and synthetic makeup brushes, removing makeup effectively without being too harsh on the bristles.
Can I Use Dish Soap?
Dish soap removes oil and heavy foundation very well, but frequent use may dry out some natural bristles. It’s best reserved for occasional use on brushes with stubborn makeup buildup.
Can Dirty Makeup Brushes Cause Acne?
Dirty brushes can collect oil, dead skin cells, and bacteria, and when these build up, they may contribute to clogged pores and breakouts, especially if you use cream or liquid makeup products.
How Long Do Makeup Brushes Take to Dry?
Small eye brushes usually dry within a few hours, while larger face brushes often need six to twelve hours. Drying time ultimately depends on the size of the brush and how much water remains in the bristles.
Should I Sanitize My Makeup Brushes?
If you’re the only person using your brushes, regular washing is usually enough. Professional makeup artists, however, should also sanitize their brushes between clients to reduce the risk of cross-contamination.
Can I Clean Makeup Brushes Without Water?
Yes. A quick-drying brush cleaning spray can remove surface makeup between uses, but you should still deep clean your brushes with water on a regular schedule for the best results.
Key Takeaways
Keeping your makeup brushes clean is one of the easiest ways to protect your skin and improve your entire makeup routine. Keep these simple points in mind:
- Wash brushes regularly to remove makeup, oil, and bacteria.
- Use a gentle cleanser and lukewarm water.
- Keep water away from the ferrule.
- Let brushes air dry while lying flat.
- Store brushes in a clean and dry place.
- Replace brushes when they lose their shape or begin shedding.
- Clean makeup sponges frequently because they absorb more liquid products.
A few minutes of brush care each week can help your makeup apply more smoothly, keep your skin healthier, and extend the life of your favorite beauty tools.
Final Thoughts
Cleaning your makeup brushes is one of those small habits that can make a noticeable difference over time. In my experience reviewing beauty care recommendations and common brush maintenance practices, the people who clean their brushes regularly often notice two things first: their makeup applies more smoothly, and their brushes stay in good condition much longer.
Many people put off cleaning because they think it takes too much time or requires special products. In reality, spending just a few minutes each week is usually enough to remove makeup buildup before it becomes difficult to clean. That simple routine can help protect your brushes, improve makeup application, and support better makeup hygiene.
If there’s one takeaway from this guide, it’s this: consistency matters more than perfection. You don’t need an expensive cleaning routine or professional products to care for your brushes. A gentle cleanser, proper drying, and regular maintenance are enough for most people.
Treat your makeup brushes like the beauty tools they are. A little care today can help them perform better tomorrow—and keep your makeup routine cleaner, easier, and more enjoyable every time you use them.